Master the Art of Cooking a Flavorful Ham: A Step-by-Step Guide
Cooking a ham is more than just a culinary task; it is an art form that requires precision, patience, and a deep understanding of flavors. A perfectly cooked ham can be the centerpiece of any meal, delighting both the eyes and the taste buds. Whether you are preparing a holiday feast or simply hosting a gathering with loved ones, mastering the art of cooking a flavorful ham will elevate your culinary skills to new heights. In this step-by-step guide, we will take you through each stage of the process, from selecting the perfect ham to carving it with finesse. So grab your apron and let's embark on this delicious journey together!
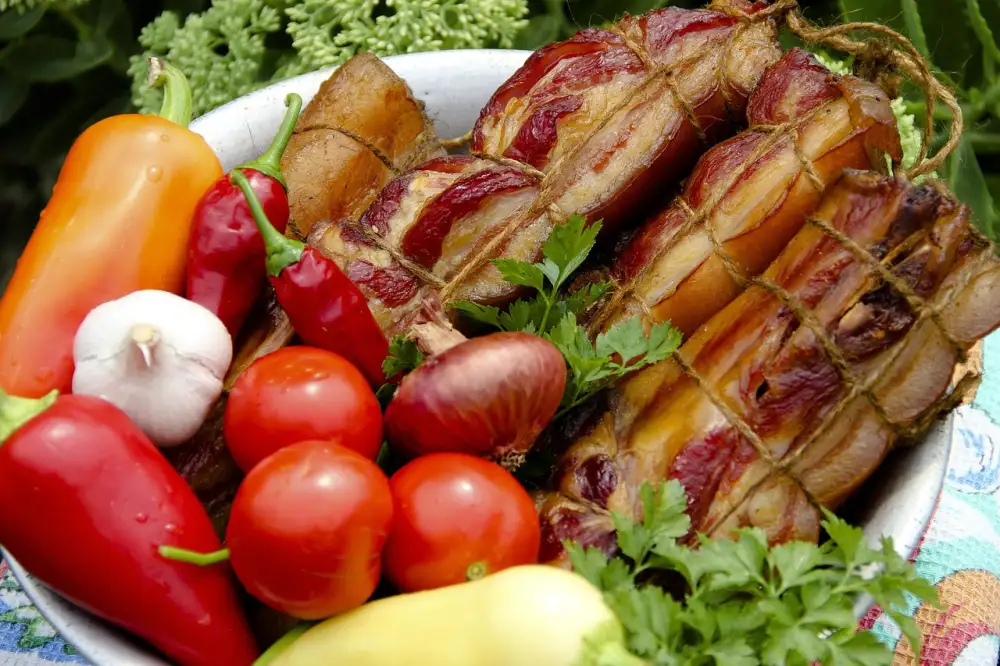
Step 1: Selecting the Perfect Ham
The key to cooking a flavorful ham starts with selecting the perfect one. When choosing a ham, consider the type and quality. There are two main types of hams: city hams and country hams.
City hams are typically wet-cured and have a milder flavor. They are readily available in most supermarkets and are a popular choice for holiday dinners. Country hams, on the other hand, are dry-cured and have a more intense, salty flavor. They require longer cooking times but offer a unique taste experience.
When selecting your ham, look for one that has firm, pinkish meat with marbling throughout. Avoid hams that have excessive fat or an off-putting odor. Consider the size of your gathering when choosing the weight of the ham - plan for about 1/2 pound per person.
If possible, opt for a bone-in ham as it adds more flavor during cooking. Spiral-cut hams are convenient for serving but tend to dry out faster.
Remember, selecting the perfect ham is just the first step towards mastering the art of cooking it to perfection!
Step 2: Preparing the Ham for Cooking
Before you start cooking your ham, it's important to prepare it properly. Begin by removing any packaging or netting from the ham. Rinse it under cold water to remove any excess salt or brine. Pat the ham dry with paper towels.
Next, trim off any excess fat from the surface of the ham, leaving a thin layer for flavor and moisture. Score the fat in a diamond pattern using a sharp knife, being careful not to cut too deep into the meat.
If your ham has a bone-in, use a small paring knife to carefully trim around the bone, exposing it slightly. This will allow for more even cooking and easier carving later on.
Once you have prepared the ham, place it on a rack in a roasting pan with the fat side up. This will allow the fat to baste the meat as it cooks and ensure a juicy and flavorful result.
By taking these simple steps to prepare your ham before cooking, you are setting yourself up for success in creating a delicious centerpiece for your meal.
Step 3: Seasoning the Ham
Now that you have selected the perfect ham and prepared it for cooking, it's time to add some flavor. Seasoning is a crucial step in enhancing the taste of your ham.
Start by creating a simple seasoning mix. Combine salt, pepper, garlic powder, and any other herbs or spices you prefer. This will help to bring out the natural flavors of the meat.
Next, generously rub the seasoning mixture all over the surface of the ham. Make sure to get into all the nooks and crannies for maximum flavor penetration.
For an extra burst of taste, consider adding a glaze or marinade to your ham. A popular option is a mixture of brown sugar, mustard, and honey. This sweet and tangy glaze will caramelize during cooking, creating a delicious crust on the outside of the ham.
Allow the seasoned ham to sit for at least 30 minutes before cooking. This will give the flavors time to meld together and infuse into the meat.
Remember, seasoning is all about personal preference. Feel free to experiment with different herbs and spices to create your own unique flavor profile. Just be mindful not to overpower the natural taste of the ham.
With your perfectly seasoned ham ready to go, it's time to move on to step four: cooking!
Step 4: Cooking the Ham
Now that your ham is seasoned and ready, it's time to cook it to perfection. The cooking method will depend on the type of ham you have chosen. For a fully cooked ham, preheat your oven to 325°F (160°C). Place the ham in a roasting pan with a rack, fat side up. Cover the pan with aluminum foil.
Cooking times will vary depending on the size of your ham. As a general guideline, allow for approximately 15-18 minutes per pound of ham. Insert a meat thermometer into the thickest part of the meat, making sure it doesn't touch bone or fat. The internal temperature should reach 140°F (60°C).
Baste the ham with its own juices every 30 minutes to keep it moist and flavorful. If you desire a crispy exterior, remove the foil during the last 30 minutes of cooking.
Once the ham reaches the desired temperature, remove it from the oven and let it rest for about 15-20 minutes before carving. This allows the juices to redistribute throughout the meat, resulting in a more tender and succulent ham.
Cooking a ham requires patience and attention to detail, but when done right, it rewards you with mouthwatering flavors and an irresistible aroma that will make any occasion special.
Step 5: Glazing the Ham
Once the ham is cooked to perfection, it's time to add a delicious glaze that will enhance its flavor and appearance. Glazing a ham not only adds a beautiful caramelized finish but also imparts a sweet and savory taste.
To begin, carefully remove the ham from the oven and increase the temperature to 425°F (220°C). This higher heat will help create a glossy glaze on the surface of the ham.
Next, using a sharp knife, score the fat layer in a diamond pattern. Be careful not to cut too deeply into the meat. The scoring allows the glaze to penetrate and infuse every bite with flavor.
Now, choose your desired glaze. Popular options include honey mustard, brown sugar and pineapple, or maple syrup with Dijon mustard. Whichever glaze you choose, make sure it complements the natural flavors of the ham.
Using a brush or spoon, generously apply the glaze all over the scored surface of the ham. Make sure to get into every nook and cranny for maximum flavor. Allow some of the glaze to drip down onto the bottom of your roasting pan as this will create a sticky caramelization during cooking.
Return the glazed ham to the oven and let it cook for an additional 15-20 minutes or until golden brown and shiny. Keep an eye on it to prevent burning.
Once done, remove from oven and let it rest for about 10 minutes before carving. This resting period allows for juices to redistribute throughout the meat, resulting in moist and tender slices.
The glazed ham is now ready to be served as an impressive centerpiece at any gathering. The combination of succulent meat with a flavorful glaze is sure to delight everyone's taste buds.
So go ahead, master this artful step of glazing your ham and elevate your culinary skills to new heights!
Step 6: Resting and Carving the Ham
Once the ham is cooked to perfection, it's crucial to let it rest before carving. This allows the juices to redistribute throughout the meat, resulting in a tender and flavorful slice.
To rest the ham, remove it from the oven and place it on a cutting board or serving platter. Tent it loosely with aluminum foil to keep it warm. Let it rest for at least 15 minutes, but preferably 30 minutes.
During this resting period, take the opportunity to prepare your carving station. Make sure you have a sharp carving knife and a sturdy fork or tongs to hold the ham in place while slicing.
When you're ready to carve, start by removing any string or netting that may be holding the ham together. Then, carefully slice thin pieces against the grain of the meat. The goal is to create uniform slices that showcase both the succulent interior and flavorful outer crust.
As you carve, be mindful of your technique and take your time. A well-carved ham not only looks beautiful but also ensures each slice is enjoyable for your guests.
Remember to serve your perfectly carved ham immediately or keep it covered until ready to serve. This will help retain its warmth and prevent drying out.
By following these steps, you'll master the art of cooking a flavorful ham from start to finish. So go ahead, impress your family and friends with a deliciously tender ham that will be remembered long after the meal is over!
After following these steps, you are now ready to enjoy your perfectly cooked ham. The aroma of the tender meat and flavorful seasonings will surely make your mouth water. As you carve into the ham, you'll notice how juicy and succulent it is, with each slice melting in your mouth. The glaze adds a beautiful caramelized sweetness that complements the savory flavors of the meat. Whether you're serving it as the centerpiece of a holiday feast or enjoying it on a regular day, this ham will surely impress your guests and leave them craving for more. So gather your loved ones around the table, savor each bite, and relish in the satisfaction of mastering the art of cooking a flavorful ham.
Published: 18. 11. 2023
Category: Food